Back to the roots! After a long period of high quality, high volumes fancy factory made keyboards I was missing my early DIY days. It all started from there: an idea, a bunch of hand wired switches and a layered acrylic case.
The keyboard enclosure has always been a problem. Layered acrylic (or aluminum) is definitely an option but it presents its limits and anyway you have to have access to a laser cutter. Time has passed –five year since my first custom?! gosh, time flies when you are having fun– and 3d printing finally got to a point where it’s both easily accessible and decent quality. The problem with “home” 3d printers is that the building area is rarely big enough to host a whole keyboard so we have to be creative.
I tried to 3d print some keyboard cases in the past but they were never solid enough for my taste, so I abandoned the idea for a while… until now. I experimented a bit with various designs and I came up with something that I believe is elegant and very robust.
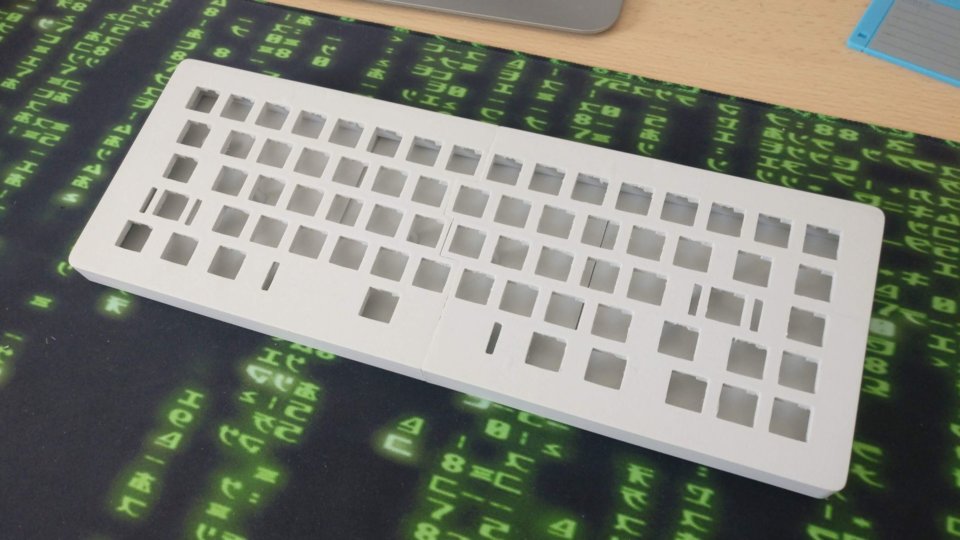
The main body is split in two halves held together by an interlocking system borrowed by wood-working. The two halves stick together pretty firmly without glue or screws but the bottom plate also helps to keep everything together.
I printed the case at 150µm layer height, 25% infill, 6 top/bottom layers and 4 walls. I went a little overboard there, you can definitely lower the resolution but I wanted the keyboard to be very stable. I believe it took about 16 hours to print all the pieces but it was well worth the wait :)
The switch holes are exactly 14mm but once printed they turned out more like 13.80mm so I had to file each and every hole, being very careful not to overdo the stabilizers holes. I could make the holes slightly bigger but I want the switches to be very tight in their spot because we won’t have a PCB to hold them down, so I guess a little elbow grease is required.

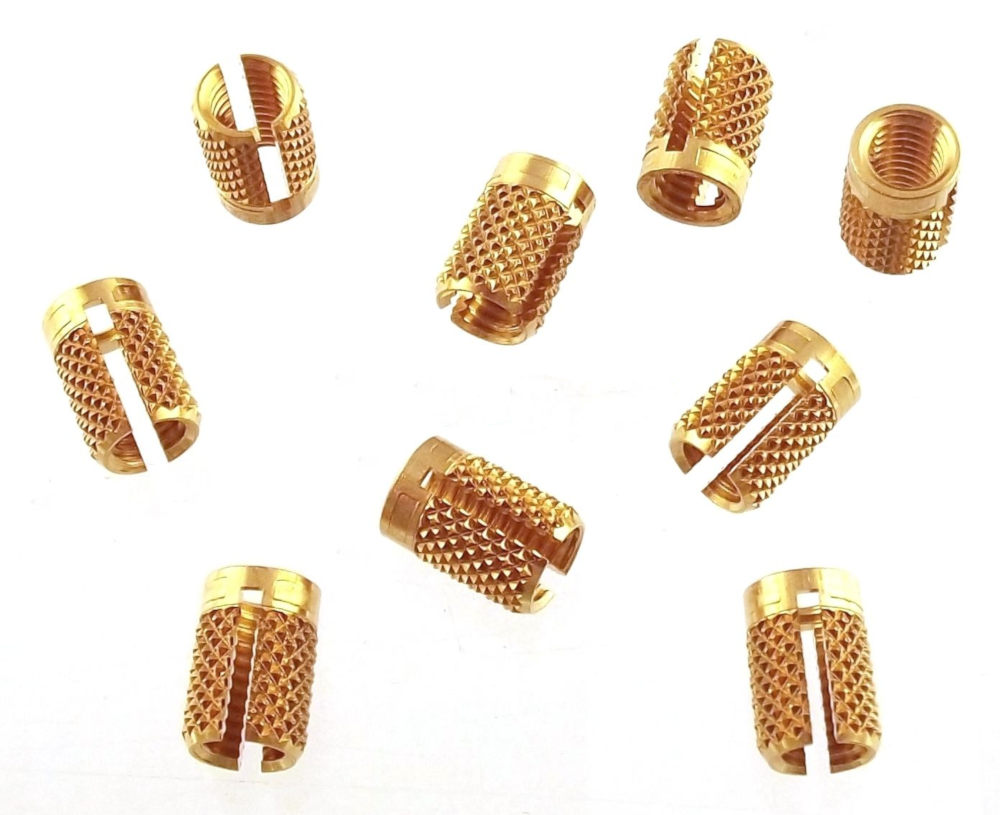
I used my go-to threaded insert for this project. It’s a 4.2mm brass insert that can host an M2.5 screw. The two arms slightly tilt when the screw is screwed in making the bond even stronger. The hole for the insert is just 4mm so they don’t actually fit, that is on purpose; you can use a soldering iron to push the insert inside its housing, doing so you’ll melt the plastic around the insert basically gluing it inside. If you can’t find them I guess it’s easy enough to modify the 3D model (see below) to your needs.
The USB slot on the back side is designed for a Teensy 3, but –again– it should be easy enough to change the model so it could accommodate any controller.
The 3D model is ready to be downloaded on Thingiverse and distributed under a very permissive license. I’ve also made the source file available on onShape, it is admittedly a pretty messy design, but hopefully you’ll be able to adjust it if you need to.
In the coming weeks I’ll be working on a hand-wiring tutorial based on this case, so if you are interested you can start printing it and check back in a few days. If you need some visual gratification I’ve also shot a short video describing this case. Happy 3d making!

Comments
Hey Matteo, this was really cool! What filament did you use to 3D print and how heavy was the case? I want to do something similar at a 3D printing place and I need the weight and type of filament to estimate the cost. They charge 10 cents per gram for PLA filament
I’m sorry I already assembled the case I don’t know how much it weights. It’s relatively sturdy, it might cost you like €15-20 I guess?! I used PLA.
This is amazing, thanks for sharing. Is it possible to get the CAD source without having an account at onShape? Sorry if that is a stupid question, I’m just getting started… I would like to modify the layout a bit.
I believe you can export the model in STL without needing an account
Hi,
What are the screw lengths used in the keyboard and what type of screw (cap, flat…)?
Thanks!
length can be anything above 3mm, I believe mine are 5-6mm. Countersunk head, but anything works.
Very interested in the hand-wiring tutorial, I love the Whitefox design and would love to take this on as a project. Looks like a lot of fun to build!
Do you think a Bluetooth controller such as this could be a viable option?
https://www.adafruit.com/product/2829
I have that controller, it should be totally feasible!
Sorry, comments are closed but you can still get in touch with the contact form.